
Forensic Analysis of volumes with Data Deduplication Enabled

In this post I hope to outline a number of options available to analysts when performing a forensic analysis of Microsoft Windows Servers that have the "Data Deduplication" feature enabled. If you are unfamiliar with the Data Deduplication feature and want additional detail on it and it's impact on forensic investigations then see my last post.
The first half of this post addresses Acquiring Volumes which you know to contain Data Deduplication. However, if you already have a disk image and you are looking to extract the data after the fact, you can jump to the 'Handling images containing deduplicated data' section below.
Acquiring Volumes where you know Data Deduplication is enabled
If you happen to know in advance that the volume you wish to acquire has Data Deduplication enabled then you may be in a position to modify your acquisition approach.
As with any acquisition the most appropriate methodology is going to be dependent on the reason for the acquisition as well as any local policies or legal constraints. I would always suggest best practice dictates that a full physical disk image (or volume image) be your starting point, and the presence of Data Deduplication doesn't impact that statement.
Coming into this exercise I had a vague hope that performing a live acquisition of the logical volume may circumvent the issue of Data Deduplication, much like it circumvents the issues with many varieties of Full Disk Encryption (FDE). However, as soon as I started to look under the hood I immediately saw why that wasn't the case, not least of all because it is possible to store more deduplicated data within a volume than would fit were the data duplicated.
If you are presented with Data Deduplication then the most forensically sound method to acquire the data will be to perform a full disk image in the usual manner, or capture a copy of VMDKs/VHDs for virtual servers per your usual methodology, and then to extract/ deduplicate the data after the fact. The key caveat associated with this proposal is that it requires that you are in a position to spin up a Windows Server 2012/ 2016 box (with the associated licensing constraints which come with this). Alternatively, it may be possible to access the data after the if you are able to virtualise a copy of the server you have acquired. This may be possible via the use of tools such as Live View or Forensic Explorer.
If you aren't able to perform any of the above then I would still recommend capturing a full image as a starting point. While you might not be able to take the best practice approach at this stage you never know when this might change or who you may be required to provide evidence to and what their capabilities may be. Once you have secured your best evidence copy, it may be worth capturing key data via an active file collection method such as FTK Imagers "Contents of a Folder" option to AD1 or using EnCase to create an L01 while you have access to the original live system.
Unoptimization
Unoptimization is the process of reversing Data Deduplication for any particular volume and returning it to a duplicated state, rehydrating the individual files and replacing the reparse points with these files. This may seem like an appealing option when acquisition of a volume with Data Deduplication enabled is required, i.e. Unoptimize the volume prior to commencing the acquisition, but there are significant implications associated with this approach.
Firstly, it may not be possible to unoptimize a volume. Noting that the feature exists specifically to facilitate the storage of more data on a volume than could be stored in it’s original duplicated form, if the volume contains a significant quantity of duplicate data, or if it is nearing capacity it will not be possible to reverse the duplication due to a lack of space in the volume.
The implication of greatest concern to forensic practitioners is the fact that unoptimizing a volume will overwrite space that was otherwise unallocated, and may have contained useful deleted data. Nevertheless is may seem applealing to capture a forensic image of the volume to preserve that recoverable data, then to unoptimize the volume and capture a second image. Certainly, assuming the volume has adequate space to be unoptimized, that is an option which would satisfy the goal of getting access to all available data in a relatively convenient manner.
If you already have an image with optimization enabled and want to unoptimize the drive there are still further implications to be considered. These will be of varying significance depending on the system in question and the circumstances surrounding the requirement for the acquisition, but they include:
- A significant length of time will be required to perform the acquisition. Capturing an image, duduplicating a potentially large volume and capturing a second image is going to take a long time. That’s more time at the controls, more time inconveniencing the system owner and more time for something to go wrong with a live, potentially business critical system.
- The unoptimization process has a system impact. Usually optimisation happens on a few files at a time, on a scheduled basis and balanced against system load. If you are manually initiating a full unoptimization it will have a significant impact on IO and RAM usage. Depending on the function and load on the server this may not be acceptable.
- Risk. Significant operations like disk imaging always carry some risk that an error occurs and system failure results. The same goes for unoptimization, as far as I am concerned it introduced unnecessary risk which is avoidable via the method outlined in this post.
In case the above diatribe didn’t make it clear, I really do not recommend performing unoptimization on a source device to facilitate an acquisition, but I appreciate it may be the only option in some circumstances. Maybe.
With that said, reviewing the output from the PowerShell command Get-DedupStatus will provide an indication as to whether unoptimization is possible.
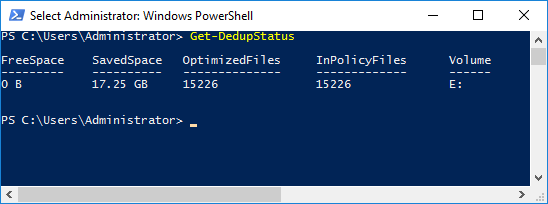
If the SavedSpace exceeds the Free Space then the drive cannot be fully Unoptimized. Assuming the volume can be Unoptimized then the following PowerShell command will initiate the process (replacing [volume] with the volume letter you wish to unoptimize:
Start-DedupJob [volume] -Type Unoptimization
This command will unoptimize the data on the volume and then disable Data Deduplication for that volume. The status of drive can then be checked with:
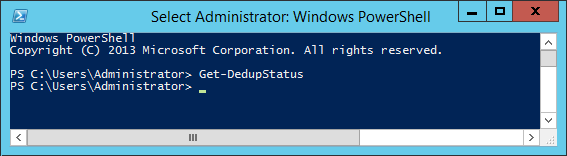
Get-DedupeStatus
If running the Get-DedupStatus returns to the command prompt withot other input, per the screenshot below, then there are no longer any optimized volumes.
Once the job has completed and the volume is no longer optimized, you can acquire it as you would any other disk/volume image. Thereafter, the appropriate command or steps to reoptimized the drive back to it’s original state will depend on how it was initially configured. You can defer to the system owner/ administrator for this information (and really I hope you engaged with them before you even considered unoptimizing volumes on their server).
Handling images containing deduplicated data
If your only option is to capture a dead disk image, or you have captured an image unaware that the volume had Data Deduplication enabled then you will have to extract the data after the fact. In most instances this would be my recommended approach anyway, i.e. capture a regular disk image and perform post processing later. As alluded to above, I have not identified a method to reverse data deduplication, or to extract the data, which does not require access to a system running Server 2012 or Server 2016.
Mounting within virtual or physical server
The first point to note is that Data Deduplication in Server 2012 and Server 2016 is not fully interchangeable. A deduplicted volume created in Server 2016 cannot be accessed by Server 2012. However, it does appear to be backwards compatible, drives created in Server 2012 can be read from Server 2016.
Whether you have a logical volume image, a physical disk image or a flat VMDK/VHD from ESXi or Hyper-V, my preferred method to access them is via the "Image Mounting" feature of FTK Imager. In the below instructions I will detail the process to access the drive from a Windows Server 2016 Standard install however the process for Server 2012 is essentially identical (assuming the drive you are attempting to access was created using Server 2012).
1. Install Server 2016
If you have a valid Server 2016 license or access to an MSDN subscription then you can acquire the ISO from those sources. I'll also point out that Microsoft make evaluation copies of both Server 2016 and 2012 available for 180 day evaluations. These can be accessed here, however whether this is a legitimate use per the evaluation license agreement is for you to decide or seek advice on, IANAL.
Whether you are using physical hardware or a Type 1/ Type 2 Hypervisor the install process is essentially the same. Install the OS and when prompted select Windows Server 2016 Standard (Desktop Experience), the 'Desktop Experience' is required to use FTK Imager to mount drives (unless I am mistaken, I don't believe this can be achieved on the command line) and makes testing files easier. If you find you have accidentally installed Server 2016 core (without the GUI), as may have happened to me more than once during testing then the below instructions were helpful:
Installing the GUI for Server 2016
Installing the GUI for Server 2012
2. Mount the volume containing deduplicated data using FTK Imager
Once you have logged into your newly created Server 2016 analysis machine you can then mount the drive in the manner of your choosing I will detail the method using FTK Imager lite however Mount Image Pro or OSFMount will work equally well.
FTK Imager Lite is sufficient for our purposes, and can be downloaded from the Access Data website here.
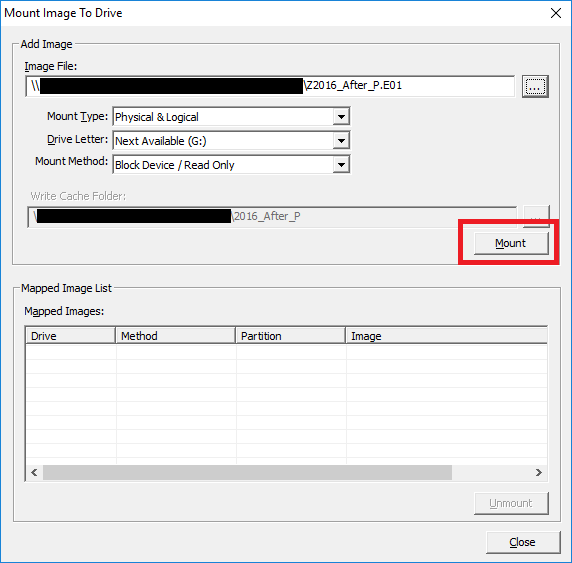
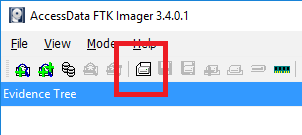
Once launched the Mount Image to Drive window, can be accessed via selecting File > Image Mounting or via selecting the Image Mounting icon icon in the Toolbar.

Populate the "Image File:" field with path to your Image/VMDK/VHD file, or browse to where it is located by clicking the button labelled '...'. Whether you are mounting a full physical image, a logical volume image or a VHD etc, the remaining fields will be automatically populated. In this instance the default settings will suffice so you can go ahead and select mount.
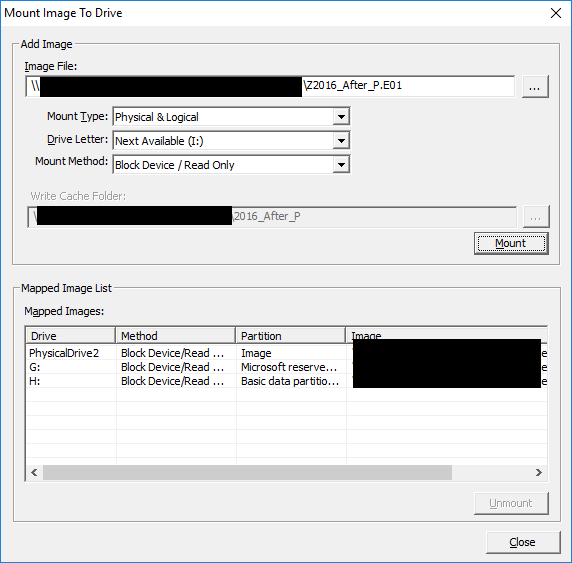
The Mapped Image list will now populate with the drive letters assigned to the partition(s) within the image file. Take a note of the drive letter which has been assigned to the volume you are interested and select Close.
Within Windows explorer you will now be able to browse the mounted image however deduplicated data will still be inaccessible, this is because Data Deduplication is not installed by default for our fresh install of Server 2012 or 2016.
3. Install Data Deduplication
The Data Deduplication Feature can be installed via PowerShell with ease, however GUI instructions follow if preferred.
To install the feature, launch a PowerShell console and type:
Install-WindowsFeature -Name FS-Data-Deduplication
Hit Enter to execute the command and the Data Deduplication feature will now install, no restart will be required. Thereafter you can revisit the mounted volume and you will note that the previously inaccessible files can now be accessed.
If you prefer to do this without having to deal with PowerShell this can be achieved using the Add Roles and Features Wizard.
Launch Server Manager, select Local Server and scroll down until you see Roles and Features:
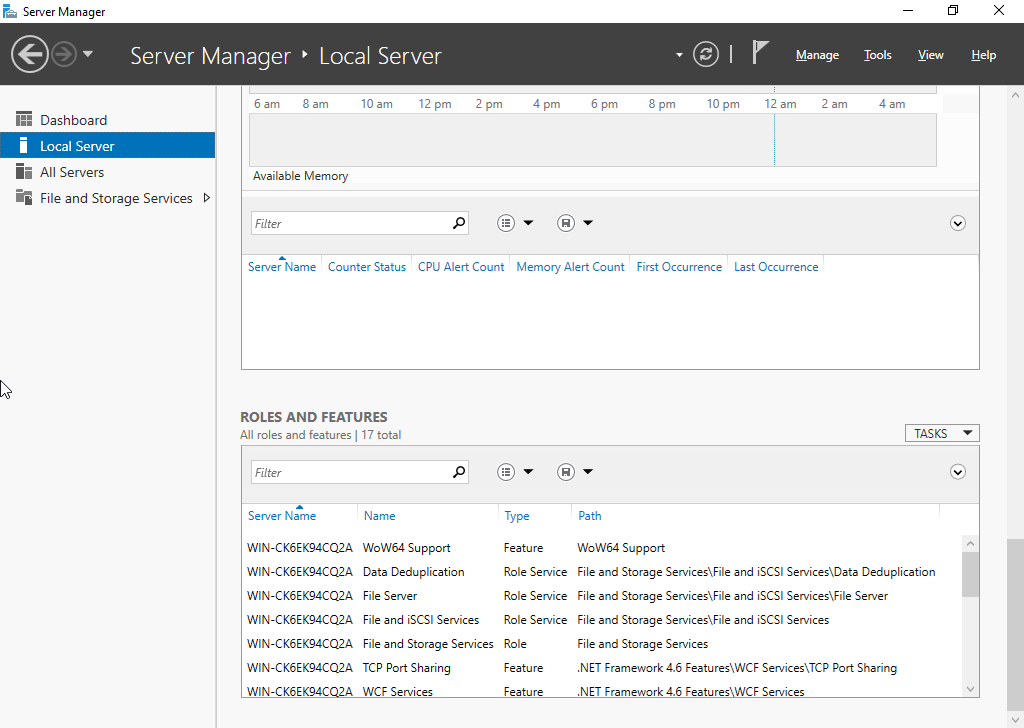
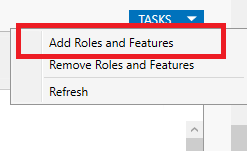
Clicking the Tasks button will bring up a dropdown menu where you can select Add Roles and Features:
Select Next to skip past 'Before you Begin' , then again to retain the default installation type as "Role-Based or feature-based installation" and a third time to keep the default server selection as your new local server.
Under Server Roles > File and Storage Services > File and iSCSI Services you will find the checkbox for Data Deduplication.
Select the Data Deduplication checkbox to add the feature and and you will receive a notification, per the below screenshot, that the 'File Server' feature requires installing as it is a dependency:
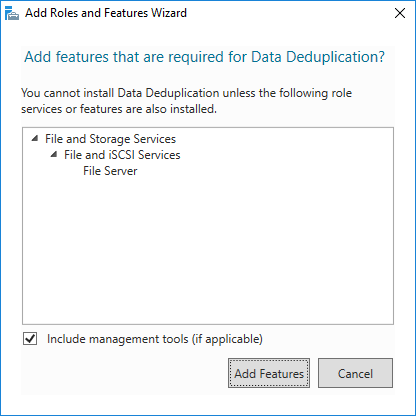
Select Add Features
Select Next
Select Install
The Data Deduplication feature will now install and no restart will be required. Thereafter you can revisit the mounted volume and you will note that the previously inaccessible files can now be accessed.
4. Acquire data
If you do not need to acquire the data but rather perform processing and parsing activities you can stop here. The mounted drive can be used for AV scans, Bulk Extractor runs etc, as long as the process you wish to undertake performs Physical Name Querying to access the active files.
If however you need to acquire copies of the files for analysis in forensic tools, or to process by some other means then you may wish to capture an logical acquisition of the files themselves into an AD1 or similar. Once again FTK Imager Lite is sufficient for our purposes, and the steps are outlined below:
If FTK Imager was used to mount the drive then it should still be running. If not then launch FTK Imager.
Once launched the process to acquire the active files to a logical container is to select File > Image Mounting or via selecting the 'Create Disk Image' icon in the Toolbar.
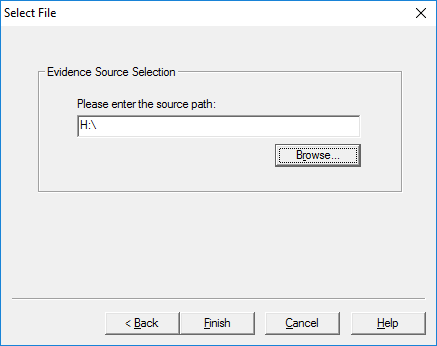
Select the Contents of a Folder evidence type. You will likely get a Warning message, which you can ignore and select Yes to continue.
Select Browse and navigate to the root of the mounted drive, remembering the drive letter as assigned when we mounted the volume. Per the below screenshot this is 'H:'. Note: If you only wish to perform a targeted collection of a limited number of files a more direct path can be entered or browsed to.
Select Finish
Within the 'Create Image' window, select Add...
Populate the case information as you require and select Next >
This will bring you to the 'Select Image Destination' Dialog box where you can Enter or Browse to a destination path for your AD1 (USB media or network location recommended).
The other settings can be left at default, select Finish and you will return to the Create Image Dialog window.
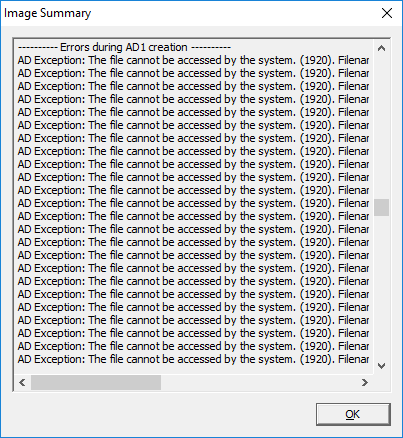
Select Start to initiate the logical acquisition. Once complete you will have an AD1 container which contained logical copies of the active files with their metadata preserved. Make sure to check the log for errors. If you attempt to perform a logical acquisition without enabling data deduplication or from a system which does not support dedupe the job will fail and the error log will look as below, showing that the files could not be accessed:
Other Options
The above methodology is my preferred approach when accessing volumes with Data Deduplication enabled, however minor modifications to the methodology may suit others better. Some modifications to consider include:
Presenting the VMDK or VHD to a Virtual server as a read only device.
If your source evidence is provided as a virtual disk then an alternative to mounting the image with software is to attach the disk to your virtual Server 2016/2012 instance via the Hypervisor. This may provide a performance improvement but is slightly more involved than using FTK Imager (or similar). There are also risks of accidentally adding the device as Read/Write so this should never be performed on original evidence.
Virtualise the source server
Personally, I have limited experience in visualizing images for review, it used to be an occasional requirement when attempting to access proprietary finance systems for insolvency matters. The last time I did this was some years ago when Live View was king and no doubt things have moved on. Some forensics shops appear to use image virtualization heavily and this technique may be useful in handling data deduplication where access to a legitimate Windows Server 2012/2016 license is not feasible. Booting a copy of the original imaged server and then using that to review or acquiring a logical copy of the data contained in a data deduplicated volume should work in theory.
Hopefully the above is useful to anyone who finds themselves up against the same issue. If you get this far and it's been helpful please let me know by leaving a comment or fire me a tweet. Comments, criticism and corrections all welcome too.