
Investigating Office365 Account Compromise without the Activities API


With the recent demise of the Office 365 Activities API, David Cowen at HECFBlog has chosen to focus his recent Sunday Funday Challenge on the remaining evidence sources available when investigating instances of Office365 account compromise. David posed the following question:
“Explain in a compromise of a Office365 account what you could review in the following circumstances.
- Scenario a: only default logging in a E3 plan
- Scenario b: Full mailbox auditing turned on
You are attempting in both scenarios to understand the scope of the attacker's access.”
The first point to note is that a compromise of Office 365 (while commonly referred to as Business Email Compromise (BEC)) is not necessarily limited to email accounts. Depending on how an organisation employs Office 365 they may host a wealth of information besides just email and attachments in O365, much of which could be valuable to an attacker. In the case of the in-scope E3 plan, each compromised user account could potentially expose:
- Exchange — Email messages, attachments and Calendars (Mailbox size up to 100GB)
- OneDrive — 1TB per user, unless increased by admins to up to 25TB.
- SharePoint — Whatever sites that user has access to.
- Skype — Messages, call and video call history data
- Microsoft Teams — Messages, call and video call history data as well as data within integrated apps.
- Yammer — Whatever it is people actually do on Yammer. Are you prepared for a full compromise of your organisation's memes, reaction gifs and cat pictures?
All of that before you concern yourself with the likelihood of credential reuse, passwords which may be stored within O365 (Within documents and emails) for other services, delegated access to other mailboxes and MDM functionality.
A Short(er) Answer
David has chosen to focus on an E3 Office 365 instance, with and without additional logging functionality enabled. Some evidence sources available in these two circumstances will be as follows.
Scenario a: only default logging in a E3 plan
Below is a non-comprehensive list of evidence sources which may be available to an examiner to assist in understanding the scale/scope of an O365 compromise:
- Unified Audit Log, via Audit Log Search in the Security & Compliance Centre and accessible using Search-UnifiedAuditLog' cmdlet. This will need to be enabled if not already enabled and appears to provide limited retrospective visibility if enabled after the fact.
- Mailbox Content
- Read Tracking
- Message Tracking Logs
- Mailbox Rule information
- Proxy Logs/ DNS Logs/ Endpoint AV Logs / SIEM
- Office 365 Management Activity API
- Azure Active Directory reports and Reporting Audit API (With Azure AD P1/P2)
Scenario b: Full mailbox auditing turned on
By default, Auditing is not enabled, nor are the more granular Mailbox Auditing and SharePoint Site Collection Audit options. However, if we assume that 'audit log search' has been enabled as well as the optional logging associated with enabling 'mailbox auditing' and that audit has been configured for all SharePoint site collections then the following additional evidence sources become available.
- Unified Audit Log, includes events recorded as a result of enabling 'mailbox auditing'.
- SharePoint Audit log reports
It should be noted that simply enabling mailbox audit logging for all mailboxes is not enough to capture all useful events. By default, only the 'UpdateFolderPermissions' action is logged with additional events requiring configuration, these include Create, HardDelete, MailboxLogin, Move, MoveToDeletedltems, SoftDelete and Update events.
SharePoint audit logging is pretty granular and, in my experience, rarely enabled. However, if correctly configured a record of user actions including document access, modification and deletion actions can be generated.
These evidence sources, their usefulness and some suggested methodologies to leverage them are outlined in the following sections. In a number of cases I have listed links for suggested additional reading as many of these topics have been well documented by Microsoft or others before me.
Unified Audit Log
The Unified Audit Log (UAL) is currently the single best source of evidence (when available) for Office 365 account compromise investigations. If enabled, user and admin activity can be searched via the Security & Compliance Center or using the ‘Search-UnifiedAuditLog’ cmdlet. Logged activity from your tenant is recorded in the audit log and retained for 90 days. It should be noted that some latency occurs between events occurring and appearing in logs, in some cases (and for some event types) Microsoft detail that this can be up to 24 hours. I have had mixed results in testing whether events prior to enabling auditing become searchable if auditing is enabled after the fact and I plan to perform additional testing and update this post with the results.
By default, Audit log Search is not enabled and attempts to access or use the Audit Log Search functionality within the Security & Compliance Centre will be met with various errors and warnings:
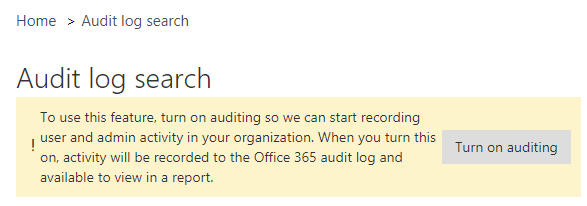

Likewise, attempts to use the `Search-UnifiedAuditLog' cmdlet will fail.
UAL search functionality can be enabled with the following PowerShell command:
Set-AdminAuditLogConfig -UnifiedAuditLogIngestionEnabled $true
Per Microsoft’s 'Search the audit log in the Office 365 Security & Compliance Center' support article, by default the UAL will contain records of:
- "User activity in SharePoint Online and OneDrive for Business
- User activity in Exchange Online (Exchange mailbox audit logging)
- Admin activity in SharePoint Online
- Admin activity in Azure Active Directory (the directory service for Office 365)
- Admin activity in Exchange Online (Exchange admin audit logging)
- User and admin activity in Sway
- eDiscovery activities in the Office 365 Security & Compliance Center
- User and admin activity in Power BI for Office 365
- User and admin activity in Microsoft Teams
- User and admin activity in Yammer
- User and admin activity in Microsoft Stream"
The same article includes the following important note:
“Important: Mailbox audit logging must be turned on for each user mailbox before user activity in Exchange Online will be logged. For more information, see Enable mailbox auditing in Office 365.”
Additionally, if the Audit Log Search functionality is enabled after the fact it will take some hours to become available and thereafter 24 hours for some events to be populated.
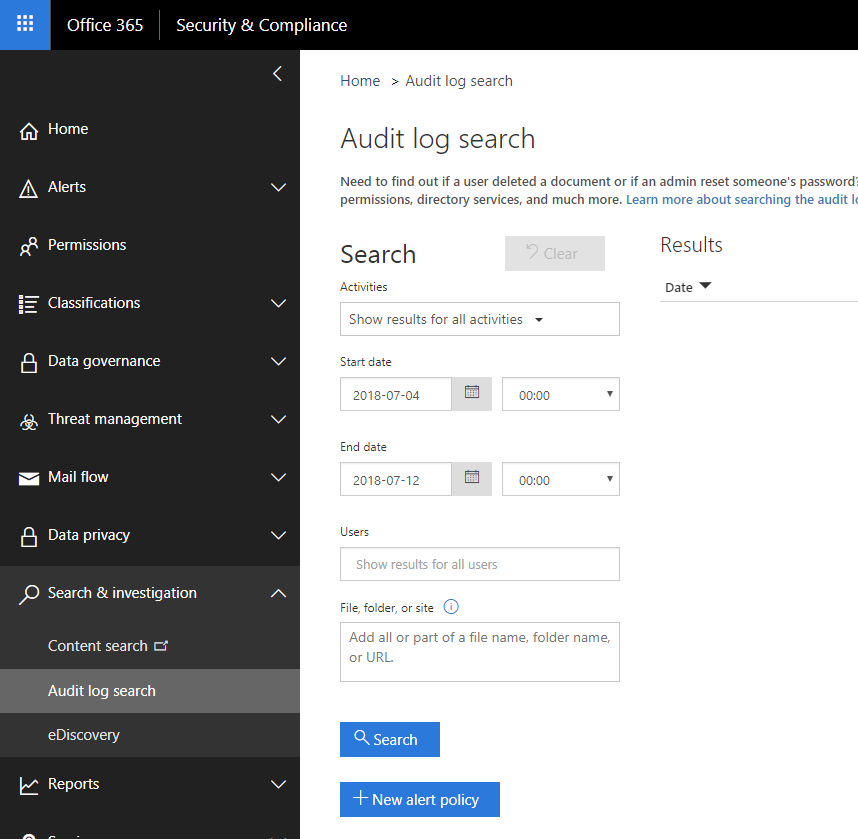
If enabled the Audit Log can be searched and exported in one of two ways. Firstly, it is accessible via the Security & Compliance Center by navigating to Search & Compliance -> Search & Investigation -> Audit log search. This will present you with a screen as below which can be used to perform searches and export results:
Alternatively, the ‘Search-UnifiedAuditLog’ cmdlet can be used to perform searches and output targeted results. Some useful commands are provided below:
Dump ALL available Audit Data within a date range:
Search-UnifiedAuditLog -StartDate [YYYY-MM-DD] -EndDate [YYYY-MM-DD] | Export-csv "E:\Cases\InvestigationXYZ\BadIPsActivity.csv"
Unsurprisingly on even medium size tenants or where the date range is too large this fails. Specifically, due to the maximum number of records which can be retrieved during a particular session being capped at 50,000. The Microsoft blog post 'Retrieving Office 365 Audit Data using PowerShell' addresses this issue and provides a script which can assist. In any event, more targeted searches are advisable:
Dump ALL available Audit Data within a date range for a particular user:
Search-UnifiedAuditLog -StartDate [YYYY-MM-DD] -EndDate [YYYY-MM-DD] -UserIds [USER,USER,USER] | Export-csv "E:\Cases\InvestigationXYZ\BadIPsActivity.csv"
Review failed login attempts for all users:
Search-UnifiedAuditLog -StartDate [YYYY-MM-DD] -EndDate [YYYY-MM-DD] -Operations UserLoginFailed -SessionCommand ReturnLargeSet -ResultSize 5000 | Export-csv "E:\Cases\InvestigationXYZ\FailedLogins.csv"
Find all log entries associated with a known malicious IP(s) during a specific date range:
Search-UnifiedAuditLog -IPAddresses [IPAddress] -StartDate [YYYY-MM-DD] -EndDate [YYYY-MM-DD] -ResultSize 5000 | Export-csv "E:\Cases\InvestigationXYZ\BadIPActivity.csv"
And for a list of IPs:
Search-UnifiedAuditLog -IPAddresses [IPaddress1],[IPaddress2] -StartDate [YYYY-MM-DD] -EndDate [YYYY-MM-DD] -ResultSize 5000 | Export-csv "E:\Cases\InvestigationXYZ\BadIPsActivity.csv"
Particular record types can be targeted using the '-RecordType' attribute and a list of attributes is provided in the MS documentation, here.
As previously mentioned, having Mailbox Auditing enabled will cause additional events to be logged in the UAL. To enable Mailbox Auditing for all mailboxes the following command can be run:
Get-Mailbox -ResultSize Unlimited -Filter {RecipientTypeDetails -eq "UserMailbox"} | Set-Mailbox -AuditEnabled $true
Separately from enabling UAL Search, additional logging detail can be captured by enabling ‘Mailbox Auditing’. The resulting events will be accessible using the UAL Search but it should be noted that if auditing is not enabled prior to an incident then visibility cannot be added after the fact. I have only performed limited testing of this over a short period so would be interested to hear if anyone has contrary experience.
By default, enabling mailbox auditing will only record 'UpdateFolderPermissions' events so additional configuration is required to ensure that other owner actions are captured. The below command will enable all available owner actions for all mailboxes:
Get-Mailbox -ResultSize Unlimited -Filter {RecipientTypeDetails -eq "UserMailbox"} | Set-Mailbox -AuditOwner @{Add="MailboxLogin","HardDelete","SoftDelete","FolderBind","Update","Move","MoveToD eletedItems","SendAs","SendOnBehalf","Create"}
Be aware that enabling all of these auditing settings for an entire tenant will flood the UAL with audit events and can cause a lot of noise (and potentially a performance impact for searches). More details on enabling Mailbox Auditing is available here. The data is also apparently stored in such a way that it contributes to their mailbox storage allocation and this can cause issues if recorded activities become too large.
To review the audit status of a particular account the following command can be used:
Get-Mailbox -Identity [target mailbox] | fl name,*audit*
Once enabled the same UAL queries above will return more detailed results of user activity within mailboxes and most notably MailboxLogin events. In addition to the ‘Search-UnifiedAuditLog’ cmdlet there is also a 'Search-MailboxAuditLog' cmdlet which can be employed, documentation for which can be found here.
Some further useful resources on UAL and Mailbox Auditing are as follows:
- Turn Office 365 audit log search on or off
- Enable mailbox auditing in Office 365
- Search the audit log in the Office 365 Security & Compliance Center
- Detailed properties in the Office 365 audit log
- Retrieve granular user actions or usage reports using Search-UnifiedAuditLog cmdlet
While traditional logs (enabled or otherwise) are always a go-to source of evidence there are a number of other valuable sources which can help to identify compromised accounts and understand the scope and impact of an account compromise.
Mailbox content
The content of mailboxes is important in BEC cases for several reasons; being able to search, access and review it can help answer the following questions:
- Who currently has a known malicious email message in their inbox?
- Who may have read a malicious email message?
- What was the provenance, payload and content of a malicious email message?
- What items have been sent from a compromise account?
- What the possible exposure may be?
The content of a mailbox, or all mailboxes, as they exist at the time of analysis can be determined through the use of a number of PowerShell cmdlets. It should be noted that mailbox content searches/reviews can be targeted or tenant wide and the usefulness of these investigative methods will often be contingent on the number of users in a tenant.
Please also note that the use of these cmdlets to identify and delete malicious messages is not without risk. Typos, unnecessarily broad queries and other unforeseen complications can become CV generating moments when you delete data you shouldn't have.
Hunting for Known Malicious Messages
It is quite common in the early phases of incident investigation for IT/IR staff to be provided with a copy (often forwarded) or a description of a phishing message. It can be desirable to capture a forensically sound copy of such a message for analysis.
Per it's Microsoft documentation "you can use the Search-Mailbox cmdlet to search messages in a specified mailbox and perform any of the following tasks:
- Copy messages to a specified target mailbox.
- Delete messages from the source mailbox. You have to be assigned the Mailbox Import Export management role to delete messages.
- Perform single item recovery to recover items from a user's Recoverable Items folder.
- Clean up the Recoverable Items folder for a mailbox when it has reached the Recoverable Items hard quota."
"Note: By default, Search-Mailbox is available only in the Mailbox Search or Mailbox Import Export roles, and these roles aren't assigned to any role groups. To use this cmdlet, you need to add one or both of the roles to a role group (for example, the Organization Management role group). Only the Mailbox Import Export role gives you access to the DeleteContent parameter."
Additionally, as Office 365 E3 Subscriptions (or Exchange Plan 2) come with eDiscovery functionality, we can also leverage the Discovery Search Mailbox and eDiscovery functionality to assist in collating the messages we wish to analyse. The below examples show queries which can be used to identify and copy samples of malicious messages:
Get-Mailbox | Search-Mailbox -SearchQuery "Subject:phish" -TargetMailbox "Discovery Search Mailbox" -TargetFolder "IncidentXYZ" -LogLevel Full
This command searches all mailboxes for email messages containing the string "phish" in their subject and copies them to the Discovery Search Mailbox within a folder called 'IncidentXYZ', if the folder does not exist it will be created. Setting the ‘-LogLevel’ parameter to Full will cause a CSV of results to be generated and emailed to the target mailbox, this can be extremely useful so is recommended.
Alternatively, we can export to any other mailbox as below:
Get-Mailbox | Search-Mailbox -SearchQuery "Subject:phish" -TargetMailbox "anyone@yourdomain.com" -TargetFolder "IncidentXYZ" -LogLevel Full
Note however that the TargetMailbox will be excluded from any search so you better make sure it doesn't contain any respondent data or it will be missed.
In both cases it can be preferable to get a feel for the number of matching responses prior to executing a copy command, this can be achieved with the '-EstimateResultOnly' parameter which will perform the search but not copy any messages, example below:
Get-Mailbox | Search-Mailbox -SearchQuery "Subject:phish" -EstimateResultOnly
In these examples we have relied upon a known string within the subject however there are a number of search criteria which can be used as alternatives or in combination, e.g.:
from:hax0r@baddomain.cf
attachment:trojan*
sent:"last week"
The last, and indeed any other date queries can accept a date (YYYY-MM-DD), date range (YYYY-MM-DD..YYYY-MM-DD) or date interval (e.g. today, yesterday, this week, this month). A fuller list of queryable attributes and descriptions is available here.
Also associated with eDiscovery functionality and again requiring the Mailbox Search role are the New-ComplianceSearch, Get-ComplianceSearch and Start-ComplianceSearch cmdlets.
Performing a Compliance Search will allow you to group messages for export, preservation or deletion. As with all of these queries is important to be specific enough, so as to only capture the messages of interest, as such as source email addresses and unique strings from subjects (particularly when combined tight date ranges) make for good queries.
An example command below will capture all messages from 'hax0r@baddomain.cf containing the string 'phish' in the subject and name the search ‘IncidentXYZ-PhishingMessages’.
New-ComplianceSearch -Name "IncidentXYZ-PhishingMessages" -ContentMatchQuery " (From:hax0r@baddomain.cf) AND (Subject:"*phish*")"
While we are here, we are also able to remove identified malicious messages using New-ComplianceSearchAction, assuming we have already used New-ComplianceSearch to identify the malicious messages, as in the above example:
New-ComplianceSearchAction -SearchName "IncidentXYZ-PhishingMessages" -Purge - PurgeType SoftDelete
This methodology is detailed in greater detail here.
Extracting a sample of malicious message(s)
An alternative method for searching for known malicious messages to is to use the Security & Compliance Center as detailed here. The Security & Compliance Center is probably the easiest way to extract sample messages as you can perform searches, review results then download of individual email messages as .eml or groups to a .pst, all from the comfort of a GUI.
Analysis of such samples help in understanding the provenance, payload and content of a malicious email message. The same methodology can be used to export email messages sent from compromised accounts by malicious actors or to perform wholesale exports of mailbox(es) for legal review when trying to assess the impact associated with a mailbox compromise.
Read Tracking
If enabled, and unfortunately disabled by default, Read Tracking via the `Get-MessageTrackingReport' cmdlet can be used to determine whether email messages within the organisation have been read. Commonly attackers will compromise one account and then use it to phish other accounts for credentials so being able to quickly determine how many users received and read these messages can be helpful.
You can check whether Read Tracking is enabled with the following PowerShell command:
Get-OrganizationConfig I Select ReadTrackingEnabled
If it is enabled then you are in luck and you can follow the below guides, or associated scripts to confirm who has read a particular email message:
Tracking Read Status of Email Messages in Exchange Server
EWS Powershell Script to find the ‘True’ Read Status of an email message
Message tracking can be enabled with the below command:
Set-OrganizationConfig -ReadTrackingEnabled $true
However, it should be noted that this will not have a retroactive effect. It needs to have been enabled before the notable messages were sent.
Using the methods detailed above, we can identify, extract and if required delete malicious messages from the mailboxes of users. However, content searches are rarely the most efficient method to answer some of these questions. Commonly we just require details of all recipients of a particular malicious email, or we want details of all accounts who have interacted with known malicious email addresses or maybe we want a list of all addresses which were contacted from a compromised account during the known window of compromise. In these instances, Message Tracking Logs can be very helpful.
Message Tracking Logs
Message tracking logs provide a record of messages which have been transmitted into, out of and within a tenant and as such can be invaluable in instances of BEC.
An example command is detailed below:
Get-MessageTrace -StartDate [START_DATE] -EndDate [END_DATE} -PageSize 5000 I Where {$ .Subject -like "*phish*"} I ft -Wrap
This command searches Message Trace Logs for messages sent between two dates, with the string "phish" in the subject. While it increases the page size to 5000 (the maximum) from a default of 1000 this still may not be adequate in a large tenant or in a wide date range. In these cases a script may be the best solution and one such script can be found here.
Note that the StartDate can't be greater than 30 days from the date of the script running. Also, the results can be truncated when long lists of recipients are associated with a single message and any mailing lists will have to be manually enumerated to confirm which users would be expected to receive an email message addressed to a group or shared mailbox.
It can also be useful to target messages originating from known bad email addresses or domain e.g.:
Get-MessageTrace -SenderAddress *@baddomain.cf I ft -Wrap
There are a number of other uses for the Message logs, and different ways queries can be used. The Microsoft Documentation associated with the cmdlet provides a number of examples and details the different query constraints which can be used.
Additionally, message trace information can also be sought within the Exchange Admin Console by navigating to EAC -> mail flow -> message trace.
Mailbox Rule information
A common technique in cases of Business Email Compromise is the use of rules by attackers to cover their tracks. The presence of maliciously added rules can often act as a quick and effective indicator to identify accounts which have been compromised.
Attackers will commonly employ sets of rules which I have come to refer to as "folder and forward" rules. They will set mailboxes to forward emails (either wholesale or subject dependent) to an external email address so they don't need to monitor the account constantly. They also often use rules to hide their malicious messages by employing foldering rules. These rules will cause any message with a specific subject (i.e. the subject they use in their fraudulent or phishing emails) to be marked as read and send directly to a folder such as Junk, RSS or any other folder the user isn't likely to review as soon as the message is received.
In some organisations rules of this type are rare and therefore stand out immediately but YMMV, particularly in organisations where the use of these types of rules is widespread.
The following PowerShell command can help to identify this activity:
foreach ($user in (get-mailbox -resultsize unlimited).UserPrincipalName) {Get-InboxRule -Mailbox $user I Select-Object MailboxOwnerID,Name,Description,Enabled,RedirectTo,MoveToFolder,ForwardTo | Export-CSV E:\Cases\InvestigationXYZ\AllUserRules.csv -NoTypelnformation -Append}
This command will iterate through the list of all users, returning details of the rules they have configured and wil produce a CSV of the results for analysis.
In addition to the use of rules an attacker can employ the forwardingSMTPAddress feature to forward all email messages received at a compromised account to another address. This can be identified with the below command.
Get-Mailbox -ResultSize unlimited | where { $.forwardingSMTPAddress -ne $NULL }
This command will produce a listing of all accounts where the forwardingSMTPAddress is not blank. It isn't uncommon for the above command to return no results as the use of forwardingSMTPAddress is not widespread in my experience. But blank results can make some uneasy so an alternative approach is to use the below command:
Get-Mailbox -resultSize unlimited | select UserPrincipalName,ForwardingSmtpAddress,DeliverToMailboxAndForward
This command will produce a listing of all accounts and include details of Forwarding Address (if enabled) and DelierToMailboxAndForward status.
We can pipe these commands to csv for later review (recommended) as follows:
Get-Mailbox -resultSize unlimited | select UserPrincipalName,ForwardingSmtpAddress,DeliverToMailboxAndForward | Export-csv E:\Cases\InvestigationXYZ\FullForwarding.csv -NoTypelnformation
While all of the above listed commands are currently written to search a full tenant, if required they can be modified to targets specific mailboxes or groups/lists of users.
Proxy Logs/ DNS Logs/ Endpoint AV Logs
I raise these evidence sources as a reminder not to be blinkered by the Office 365 component of a compromise. A significant number of users will never use Office 365 off premises and as such evidence of accessing phishing links, of malware infection and other user activity may be in more traditional locations.
Commonly it is desirable to understand which users have not just received a phishing email but also followed malicious links. While the use of DNS logs, Proxy and Firewall logs may not provide 100% coverage they can be an invaluable source of evidence in identifying at least some of the impacted users.
Office 365 Management Activity API
While Unified Audit Log Search may not be enabled on a tenant, much of the same data is still accessible (albeit with less granularity where mailbox auditing is not enabled) via use of the Office 365 Management Activity API.
This API is worthy of a separate post on its own and this post is long enough as it is, so I won't go into full detail here, but in the meantime some useful resources are provided below:
Office 365 Management Activity API reference
Office 365 Management Activity API schema
Additionally, while the above resources would assist in writing your own tool/application to query the API for useful information some of the hard work has already been done for you and some example tools and scripts which make use of the API are as follows:
Office 365 Auditing Report Tool Office 365APIEditor
O365-InvestigationTooling
AdminDroid Office 365 Reporter is one third party tool I have used in the past as it was used by a client and it leveraged the API and allowed for user activity reports along with many other useful reports to be pulled.
Likewise, if the organisation in question has a SIEM with O365 integration it is likely already using the Office 365 Management Activity API to pull data out of the Audit logs and this may be retained longer than the 90-day limit. In such cases the organisations own SIEM may be the best source to query this data.
Azure Active Directory reporting audit API
Azure AD has an 'audit logs activity report' and 'sign-ins activity report', as well as 'Risky sign-ins' and 'Users flagged for risk' functionality available. These reports and metrics however require an Azure Active Directory premium subscription (P1 or P2).
If at least one user has a license for AzureAD Premium then the sign-ins activity report within the AzureAD Porte can be used to provide information regarding sign-ins. These reports are accessible via the GUI and can be downloaded as CSV. Further details are provided here.
While I have used the AzureAD GUI to pull logs I haven't played with the associated API yet and need to perform some testing. I am particularly interested to determine whether adding an Azure AD P1 subscription to one user post incident will allow for historical visibility. My limited testing of the GUI suggests that logs from prior to an AzureAD subscription being added are available once the subscription starts, but I have red contrary reports in a number of places.
A PowerShell script called 'Pull Azure AD Sign In Reports' has been put together by Microsoft employee Tim Springston and will pull these reports if the appropriate subscription is available.
Other Sources
No doubt other evidence sources will exist depending on the type of incident which occurs. One notable complication will be if an administrative account is compromised as there may be concerns that unauthorised admin actions have been performed.
Besides various queries which can be used to search for evidence of admin credential abuse (e.g. looking for recently added and modified accounts etc) it is also possible to use the Search-AdminAuditLog cmdlet and Admin Audit reports within the Security & Compliance Center to investigate such concerns.
Additionally, if evidence of unauthorised SharePoint access is identified or suspected, then having audit settings enabled for the associated site collection will be invaluable. Details of Sharepoint audit settings are available here. The associated events will be populated in the UAL and an example command is as follows:
Search-UnifiedAuditLog -StartDate [YYYY-MM-DD] -EndDate [YYYY-MM-DD] -RecordType SharePointFileOperation -Operations FileAccessed -Sessionld "SharepointInvestigation" -SessionCommand ReturnNextPreviewPage
This command will return FileAccess events during a specified date range for all sites where this event is recorded.
--
Hopefully this post is useful to those engaged in investigating instances of Office 365 account compromise. No doubt there are other scenarios and other evidence sources that I wont have thought of but that's what the comments section is for. I will keep this post updated as I continue to test some areas further.